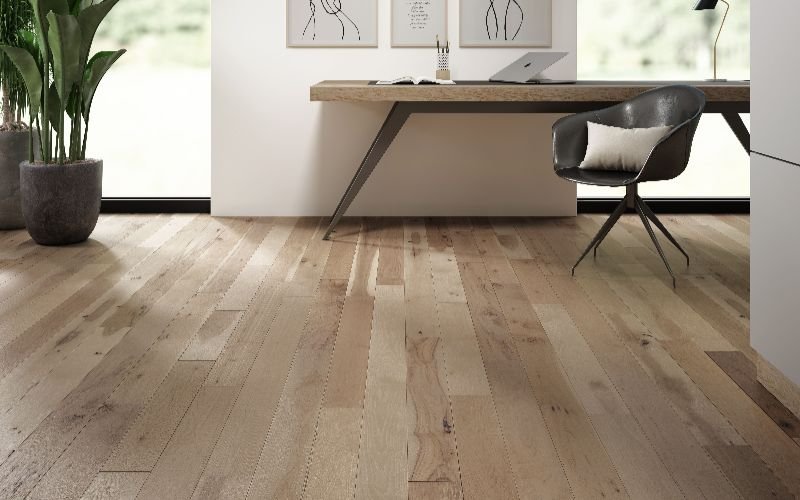
Vinyl flooring has become one of the most popular choices for modern homes and offices. It is affordable, durable, water-resistant, and comes in a wide range of styles. It mimics wood, stone, and marble textures perfectly. Even the toughest floors need proper care.
Flooring requires complete care and maintenance. Weather its your traditional style flooring or LVT flooring, maintenance is key. If you are wondering how to clean vinyl flooring without damaging it, you have come to the right place. We have crafted this complete DIY vinyl flooring guide to help you quickly clean your floors.
This complete guide covers everything: the right tools, the best cleaning solutions, a step-by-step process, room-by-room tips, stain removal hacks, and long-term maintenance advice. Whether you have luxury vinyl plank (LVP), vinyl tiles, or sheet vinyl, this guide has you covered.
What Makes Vinyl Flooring Different?
Before you grab a mop and bucket, it helps to understand what vinyl flooring is actually made of because its structure directly affects how you should clean it.
Right before you start cleaning your vinyl flooring, it’s better to understand its structure first. Knowing about its layering, composition, and chemistry will help you do the cleaning effectively.
Vinyl flooring is a synthetic, multi-layer flooring. At the top sits a wear layer, a transparent coating that protects the design beneath from scratches, stains, and everyday foot traffic.
Its top layer consists of a wear layer that protects against stains. Further, it hides scratches and staining beneath. Next is the printed design layer, followed by a core layer. It provides stability and, finally, a backing layer for comfort and insulation.
The wear layer is the most important part when it comes to cleaning. It is your floor’s shield. Harsh chemicals, abrasive scrubbers, and excess moisture can strip or damage this layer over time. This leaves your floor dull, scratched, or warped. This is why the best way to clean vinyl floors is always a gentle one.
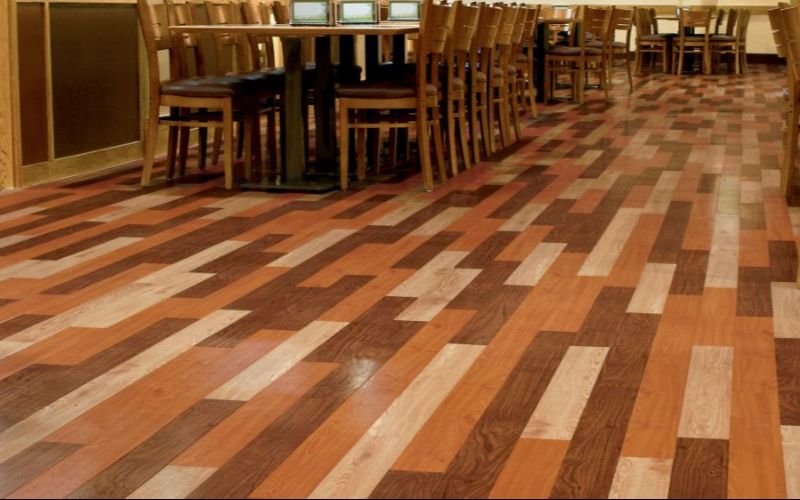
Types of Vinyl Flooring You Should Know
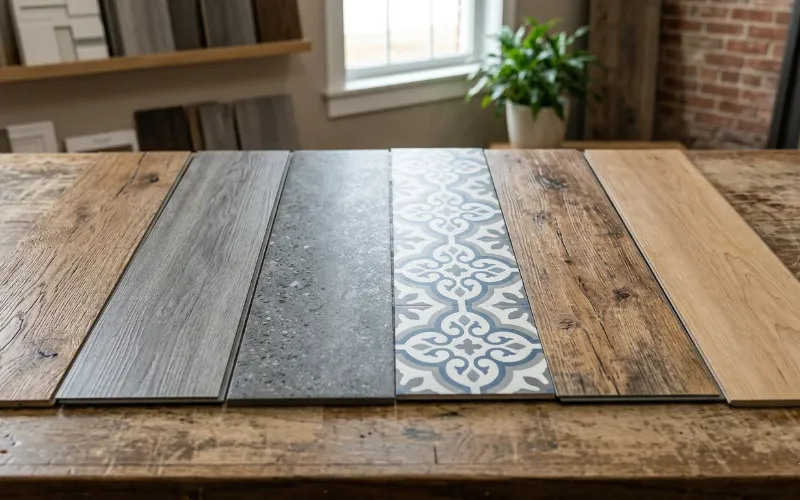
Not all vinyl floors are the same. Understanding your type helps you choose the right cleaning approach.
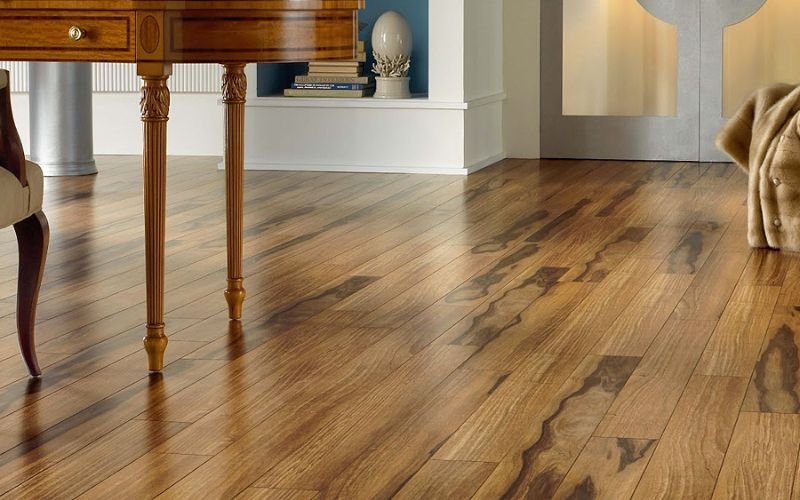
Luxury Vinyl Plank (LVP)
Thick, rigid planks that realistically mimic hardwood. Highly durable and often waterproof. The most common type in modern homes today.
Luxury Vinyl Tile (LVT)
Similar construction to LVP but in tile format, often mimicking stone or ceramic. Great for bathrooms and kitchens.
Sheet Vinyl
Comes in large rolls and is installed in one continuous piece. Have fewer seams, which means fewer places for water and bacteria to hide. However, excess water can still get under the edges.
Standard Vinyl Plank/Tile
More affordable than luxury flooring, with a thinner wear layer. Requires slightly more careful cleaning to avoid wear.
The Protective Wear Layer
Every cleaning decision you make should be made with the wear layer in mind. This layer gives vinyl its signature easy-clean quality. When it degrades, the floor loses its shine, becomes harder to clean, and is more vulnerable to staining.
Products like bleach, ammonia-based cleaners, oil soaps, wax, and abrasive pads all attack the wear layer. Steam mops are equally damaging due to the high heat and pressure, which force moisture into the seams and can cause warping and bubbling. Protecting this layer through gentle, regular cleaning is the secret to keeping vinyl floors beautiful for years.
Essential Tools and Supplies for Cleaning Vinyl Flooring
Getting the right tools together before you start makes the whole process faster and more effective. Here is everything you need.
Recommended Tools
- Soft-bristle broom
- Dust mop
- Vacuum cleaner with a hard floor setting
- Microfiber mop
- Spin mop
- Soft cloths or microfiber pads
- Soft-bristle scrub brush or nylon pad
- Two buckets
Best Cleaning Solutions for Vinyl Floors
- Warm water
- Neutral pH floor cleaner
- Mild dish soap solution
- Diluted white vinegar
- Apple cider vinegar solution
- Diluted rubbing alcohol
What NOT to Use on Vinyl Floors
Avoiding the wrong products is just as important as using the right ones. Never use the following on vinyl flooring in Dubai:
- Bleach or ammonia-based cleaners
- Abrasive powders or scouring pads
- Steam mops or steam cleaners
- Wax, polish, or varnish
- Oil-based soaps or cleaners
- Acetone or solvent-based products
- Undiluted vinegar or lemon juice
- Black soap
How to Clean Vinyl Flooring: Step-by-Step Process
Now that you have the right tools and solutions ready, here is the complete process for how to clean vinyl flooring properly. Look at the step-wise process below for your information.
Step 1: Sweep or Vacuum First
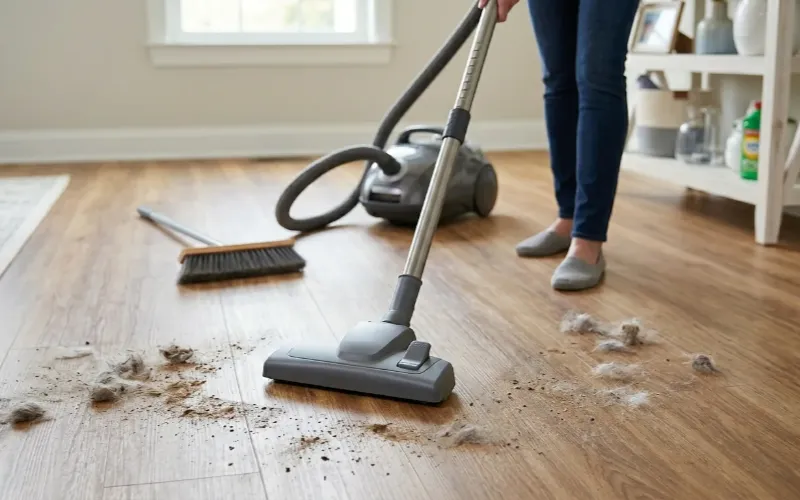
Before any water touches your floor, remove all loose dirt, dust, grit, and debris. Sand and fine grit are particularly damaging when you mop over them; they act like sandpaper and scratch the wear layer.
Use a soft-bristle broom and sweep in a systematic manner. Start working from one corner toward the exit of the room. Pay extra attention to corners, edges along walls, and under furniture where dust tends to collect. If you are using a vacuum, set it to the hard floor mode and go slowly so it picks up tiny dust particles.
For households with pets, vacuuming is often better than sweeping because it captures hair and dander rather than pushing it around. This first step is not optional; skipping it is one of the most common mistakes people make when mopping.
Step 2: Prepare Your Cleaning Solution
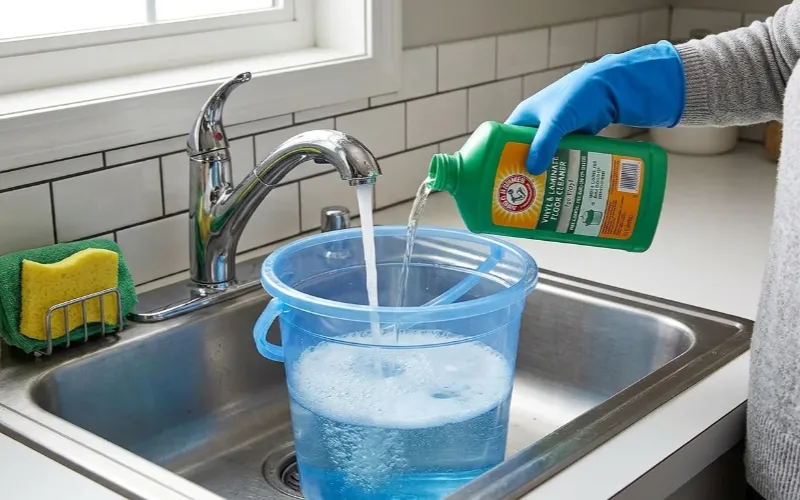
Fill your bucket with warm water. Hot water is not necessary and can sometimes affect adhesives in glue-down vinyl. Add your chosen cleaner, whether that is a small amount of mild dish soap, a pH-neutral floor cleaner, or diluted vinegar.
Stir the solution gently. Do not use too much soap. Excess foam is difficult to rinse away and leaves a sticky residue on the surface that will attract more dirt over time. A small amount of cleaning solution goes a long way. If you are using a commercial floor cleaner, read the label carefully. Every vinyl flooring is restricted to several chemical-based solutions, which cause its color to fade quickly.
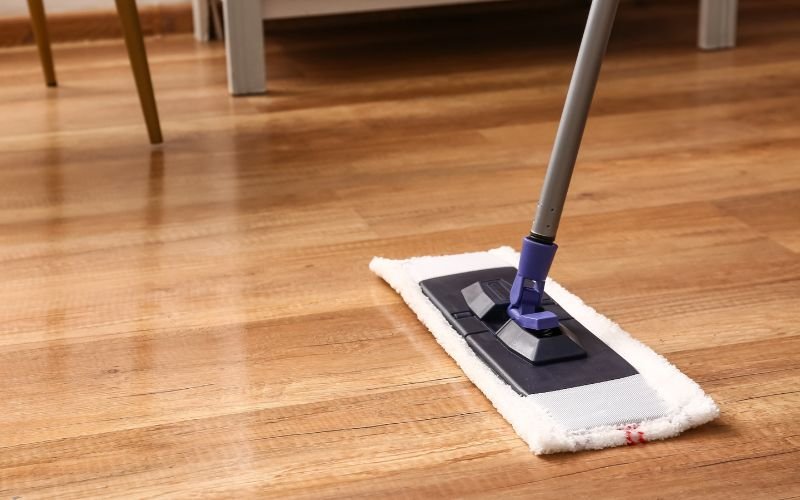
Step 3: Mop the Floor the Right Way
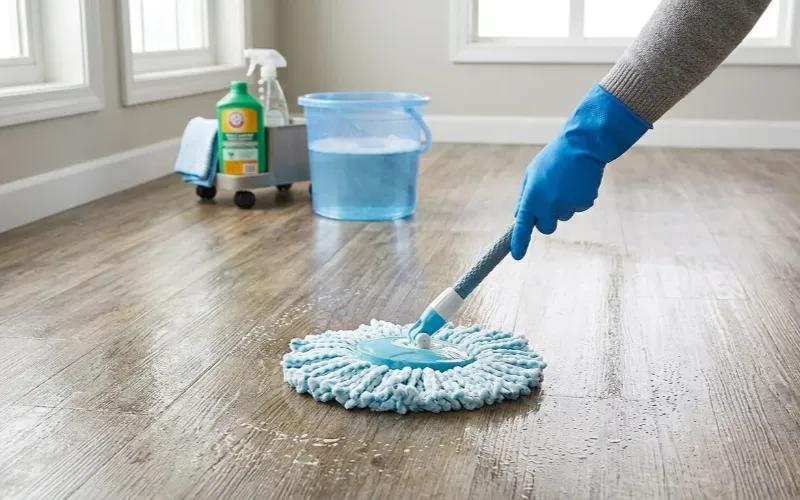
Dip your microfiber mop into the cleaning solution and twist it out thoroughly. The mop should be damp, not wet.
This is one of the most critical steps when learning how to clean vinyl floors. Too much water is one of the biggest enemies of vinyl flooring. Excess moisture can seep into the seams between planks or tiles. This weakens the adhesive underneath, causing the edges to lift over time.
Always start from the corner of the room and work your way toward the door. This way, you never step on a freshly mopped area. Mop in a back-and-forth motion, following the direction of the planks for a streak-free finish. Work in manageable sections to secure your time and energy.
After every few passes, return the mop to the bucket, rinse, and twist it out again before continuing. Using a dirty mop just relocates grime across the floor rather than removing it.
Step 4: Spot Clean Stubborn Areas
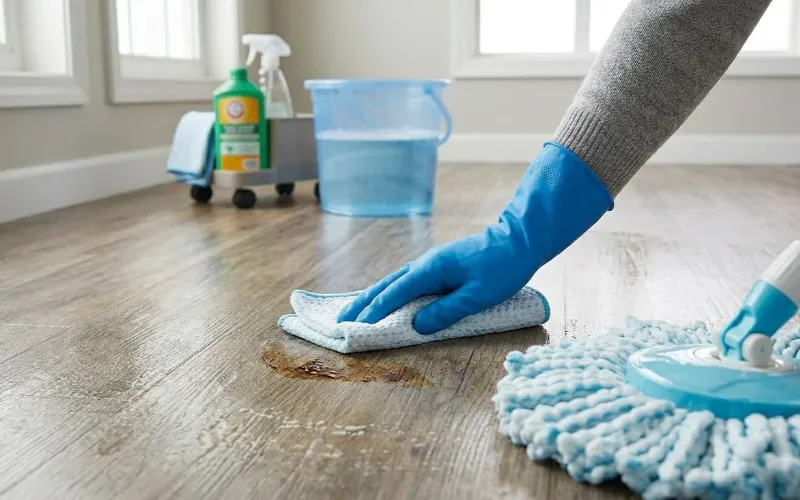
Once you have mopped the entire floor, check for any remaining stains or marks. Dampen a soft cloth or a nylon scrub pad with your cleaning solution and gently clean the affected area. Use it in a circular motion or clean from the outside of the stain inward to prevent spreading.
For most household stains, this gentle approach is enough. For more specific stains such as food, ink, rust, and scuffs, see the dedicated stain removal section below.
Step 5: Rinse and Dry Thoroughly
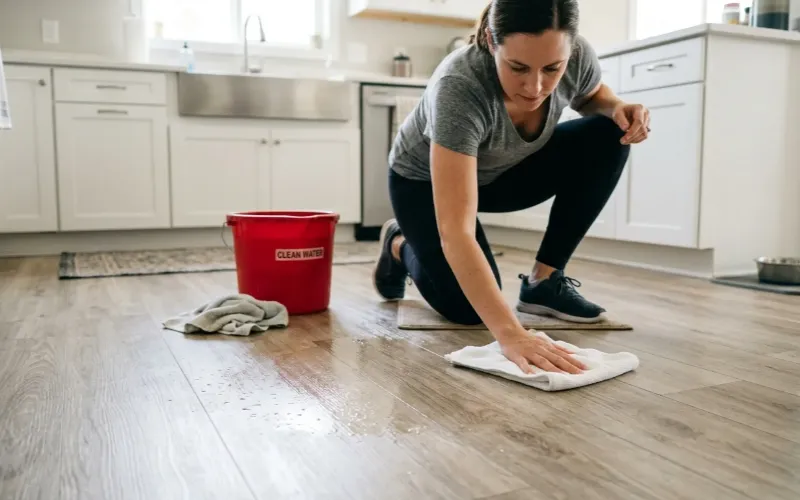
This step is often skipped, but it makes a noticeable difference. After mopping with your cleaning solution, go over the floor once more with a clean mop dampened with water. This removes any soap or cleaner residue that would otherwise leave a dull, sticky film on the surface.
Once you have rinsed the floor, dry it as quickly as possible. Use a dry microfiber cloth or dry mop pad to absorb remaining moisture. For larger rooms, a fan or open windows can enhance the drying process.
Do not allow anyone to walk on the wet floor until it is completely dry. Walking on a wet vinyl surface can leave footprints and streaks. Further, in the case of older or glued-down vinyl, prolonged moisture sitting on the surface can cause long-term damage.
How to Remove Stubborn Stains from Vinyl Floors
Even with regular cleaning, stains happen. Here is how to tackle the most common stains without damaging your floor.
Food and Grease Stains
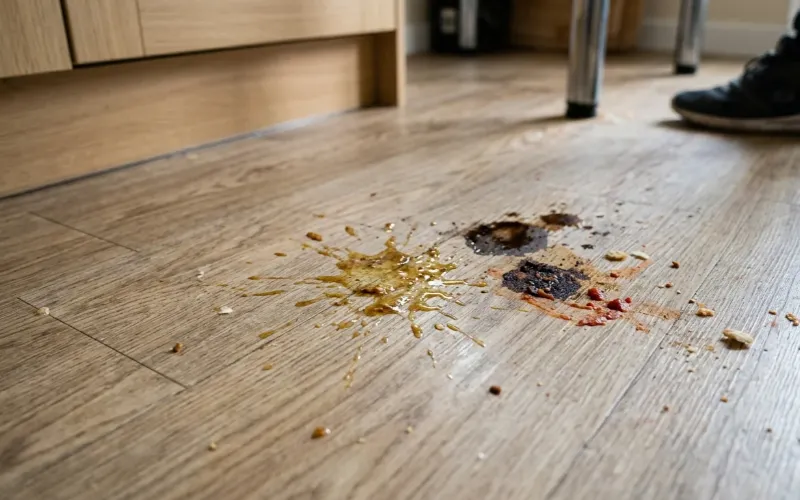
The longer a food spill sits, the more likely it is to stain or become sticky. For fresh spills, wipe immediately with a damp cloth. For dried food stains like dried milk, juice, or sauce, apply a paste of equal parts baking soda and warm water directly to the stain. Let it sit for a couple of minutes, then gently rub with a soft cloth and rinse clean.
For greasy stains from cooking oil or butter, the process will be different. Take a small drop of mild dish soap applied directly to the area. It will cut through the grease effectively.
Ink and Marker Stains
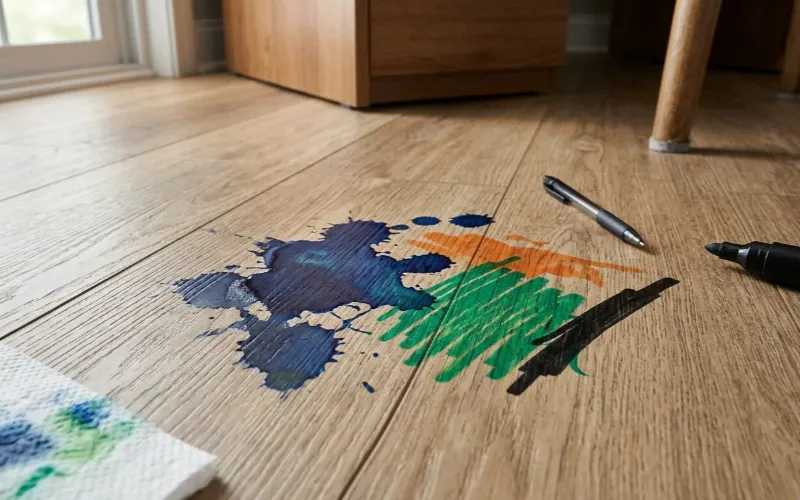
Ink stains respond well to rubbing alcohol. Apply a small amount to a soft cloth and gently dab the stain. Do not rub aggressively; it will damage the surface. For permanent marker or pen marks, try a cloth dampened with white spirit, then rinse the area thoroughly with clean water. Alcohol wipes are a convenient and effective option for ink stains. Always test any solvent on a small hidden area of your floor first to make sure it does not affect the finish.
Scuffs, Scratches, and Furniture Marks
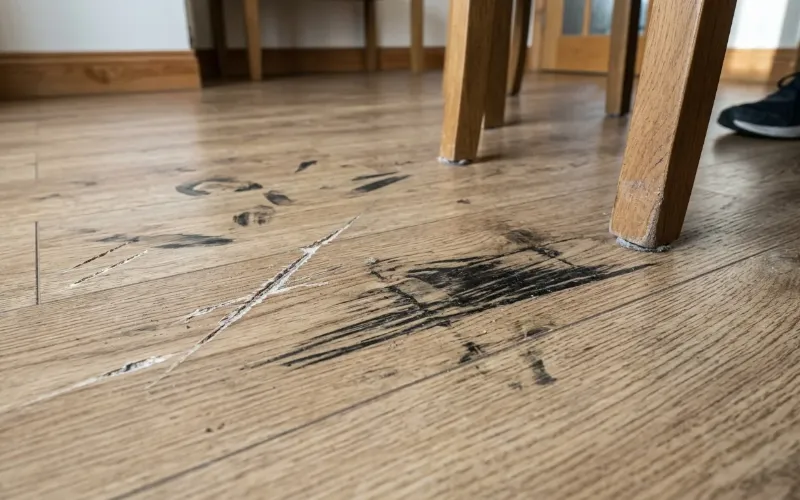
Black scuff marks from shoes or furniture legs are commonly seen on flooring. Apply a small amount of WD-40 to a microfiber cloth and rub gently over the scuff mark. The lubricant lifts the rubber transfer from the vinyl surface without scratching it. After removing the scuff, wipe the area with a damp cloth to remove any oily residue.
For light surface scratches, some homeowners use a vinyl repair compound. Which is readily available at hardware stores. Always follow the manufacturer’s guidance for this process.
Rust and Hard Water Stains
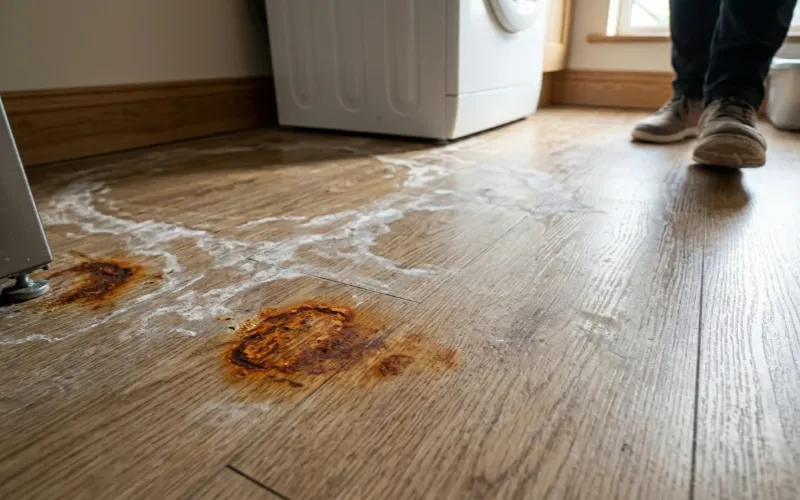
Rust stains can be removed using a rust-removal sponge or product designed for hard surfaces. Apply carefully, leave for the recommended time, then rinse thoroughly. Hard water mineral deposits respond well to a diluted white vinegar solution apply to the area, leave for a few minutes, then wipe and rinse. Do not leave acidic solutions on vinyl for too long.
Room-by-Room Vinyl Floor Cleaning Tips
Different rooms come with different challenges. Here is how to adapt the best way to clean vinyl floors to each space in your home.
Kitchen Vinyl Floors
Kitchens are the toughest place for vinyl floors. Grease splatter, food spills, heavy foot traffic, and water everything fade the flooring. In the kitchen, sweeping or vacuuming should ideally happen daily to pick up crumbs and grit before they get ground into the surface.
Weekly mopping with a mild dish soap solution is usually sufficient for kitchen floors. Pay extra attention to the area in front of the stove and sink. This tends to accumulate grease and moisture. Always wipe up spills immediately. Do not let water pool near the edges of planks or around the sink area.
Bathroom Vinyl Floors
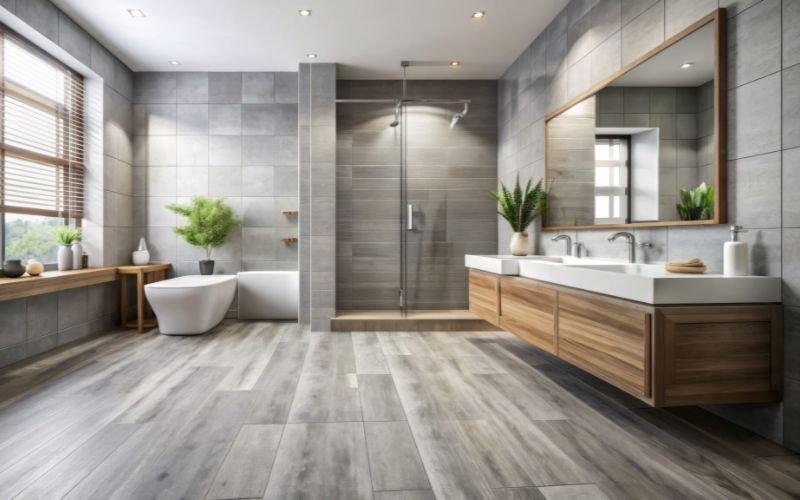
The most difficult flooring place is the bathroom. Even though vinyl is one sweep flooring, it requires detailed cleanup. Long exposure to water can damage the overall look and seep inside the seams. It results in tile tearing apart near the toilet, sink, and bathtub areas.
While most modern vinyl flooring is waterproof or highly water-resistant, prolonged pooling of water, especially near the toilet, sink, and bath, can cause issues over time, particularly with glued-down vinyl.
To avoid flooring damage, quickly wipe down any water that has splashed onto the floor. Use a bathroom-safe pH-neutral floor cleaner for your weekly mop to also address any soap foam or product residue. Good ventilation after cleaning is essential to allow the floor to dry fully and prevent humidity-related issues.
Living Room and High-Traffic Areas

Living rooms and hallways are traffic areas of any home. Further, it accumulates the most dust, pet hair, and tracked-in grit. In these areas, sweeping or vacuuming two to three times a week is a good habit. A doormat at every exterior entrance is one of the single most effective things you can do to reduce the amount of dirt that reaches your floor. Studies suggest a good doormat traps up to 80% of incoming dirt and debris.
Mop living areas after every one to two weeks using your standard cleaning solution. Move furniture to vacuum underneath at least once a month, as dust and grit tend to build up in these hidden spots and can cause scratching when furniture is moved.
How to Maintain Vinyl Flooring Long-Term
Cleaning and maintenance are an integral part of home upkeep. Long-term maintenance is what keeps vinyl floors looking great for a decade or more.
Daily, Weekly, and Monthly Cleaning Routine
Daily
Sweep or vacuum high-traffic areas. Wipe up any spills immediately.
Weekly
Mop all vinyl floors with a damp microfiber mop and a mild cleaning solution. Pay extra attention to kitchens and bathrooms.
Monthly
Move furniture and vacuum underneath. Do a more thorough check for any stains, scuffs, or damage. Clean along corners and grout lines carefully.
After Every Month
Deep clean with a slightly more concentrated cleaning solution. It focuses on high-traffic zones like entryways, hallways, and the kitchen.
How to Protect Vinyl Floors from Damage
- Attach felt pads to the bottom of all furniture legs, chairs, tables, and sofas. This single step prevents the majority of scratches and dents caused by furniture. If you need to move heavy furniture, always lift it rather than dragging it across the floor.
- Keep window blinds or curtains partially closed during peak sunlight hours. Prolonged direct sun exposure can cause vinyl flooring to fade and discolour over time, particularly in rooms with large south-facing windows.
- Trim your pets’ nails regularly. Pet nails can scratch vinyl surfaces, especially thinner standard vinyl, and regular trimming reduces this risk significantly.
- Avoid placing rubber-backed mats or rugs on vinyl flooring for extended periods. The chemicals in rubber can react with vinyl and cause permanent yellow or brown staining that is very difficult to remove.
- Keep hot objects away from the floor heaters; hot coals, and similar items can warp or melt the vinyl surface on direct contact.
How to Make Vinyl Floors Shine Again
If your vinyl floor has lost its original shine, it is most likely due to the buildup of soap residue or cleaner film on the surface. The solution is a thorough rinse mop with plain warm water, followed by proper drying.
For floors that still look dull after rinsing, a white vinegar mop is excellent for cutting through residue. Further, it restores the natural shine of the floor. Clean it using a plain water rinse.
Remember that vinyl floors do not need wax or polish to shine. In fact, these products will make the problem worse by adding more residue. The shine comes from keeping the surface clean.
Common Mistakes to Avoid When Cleaning Vinyl Floors
Even in-depth cleaning can damage vinyl floors if you make these common errors.
Using too much water
A wet mop is one of the most damaging things you can do to vinyl flooring. Especially at the seams. Always wring thoroughly before mopping.
Using a steam mop
Steam forces high-temperature moisture deep into seams and edges. Further, it causes warping, bubbling, and adhesive failure. Do not use steam on vinyl unless the manufacturer mentions it.
Skipping the dry sweep before mopping
Mopping over loose grit grinds it into the floor surface, causing fine scratches across the wear layer.
Applying wax or floor polish
Vinyl does not need these products and they create a sticky residue that is difficult to remove and attracts more dirt.
Letting spills sit
The longer a spill remains, the greater the chance it has to cause discolouration or staining. Especially acidic substances like lemon juice, vinegar, or tomato sauce cause more damage.
Not rinsing after mopping
Leaving soap residue on the floor creates a dull, sticky film that makes the floor look dirty even after cleaning.
FAQs About Cleaning Vinyl Flooring
Can I use vinegar to clean vinyl flooring?
Yes, diluted white vinegar is a safe and effective cleaner for vinyl floors. Mix one cup of white vinegar with one gallon of warm water for a gentle cleaning solution. It removes dirt and light grime without leaving residue. However, never use undiluted vinegar directly on vinyl, as repeated exposure to high acidity can damage the wear layer over time.
Is steam mopping safe for vinyl floors?
No. Steam mops are not recommended for vinyl flooring. Stick to a damp microfiber mop and warm water instead. This will prevent swelling and wapping.
How often should I clean vinyl flooring?
Sweeping or vacuuming should be done several times a week in high-traffic areas, or daily in kitchens. Wet mopping should be done at least once a week for high-use areas. Further, do it every two to four weeks for less foot traffic areas. Spills should always be cleaned up immediately, regardless of your regular schedule.
Can I wax or polish vinyl floors?
No. Vinyl floors already have a built-in protective wear layer that protects their natural shine. If your floor looks dull, the cause is likely soap build-up, which a plain water rinse will resolve.
What is the best mop for vinyl floors?
A flat microfiber mop is widely considered the best option. It is gentle on the surface, leaves minimal moisture behind, and picks up dirt and grime effectively. A well-twisted spin mop is also a good choice. Avoid traditional string mops, which hold too much water.
Can I use baking soda on vinyl floors?
Yes, but sparingly. A paste of baking soda and water can be used to treat specific stubborn stains like dried food or juice. Apply gently with a soft cloth, then rinse thoroughly. Do not use baking soda as a general floor cleaner across the entire surface, as it can leave a fine residue if not rinsed completely.
Final Thoughts
Vinyl flooring is one of the most practical and low-maintenance surfaces you can have in your home, but only if you treat it right. The best way to clean vinyl floors is consistently, gently, and using the right tools. Sweep regularly, mop with a damp microfiber mop and a pH-neutral cleaner, rinse off residue, and dry the surface properly. Tackle stains promptly and protect the floor from furniture, direct sunlight, and rubber-backed items. Utilizing all tips and tricks above, you can achieve a vinyl flooring that looks tidy and shiny.