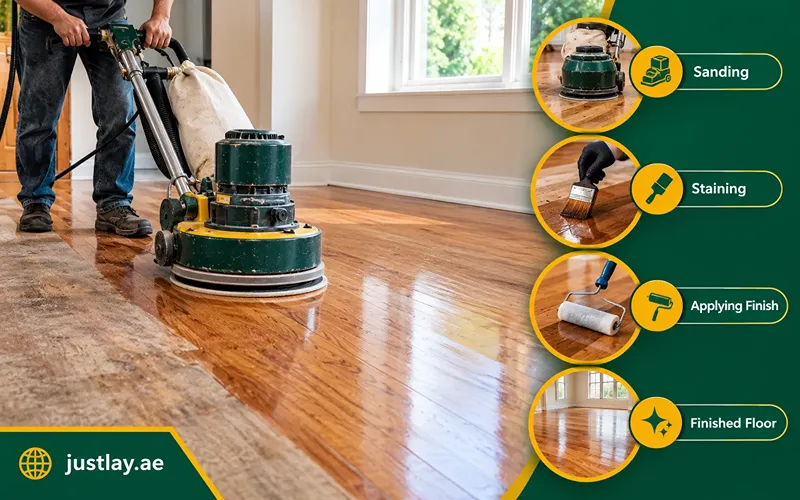
Hardwood floors can last for generations, but the finish on top does not. Foot traffic, pets, furniture and sunlight slowly wear it down. The result is scratches, dull patches and gray, thirsty-looking wood. The good news is that you rarely need to replace the floor. In most homes, a careful refinish brings it back to life for a fraction of the cost.
This guide explains how to refinish hardwood floors from start to finish. You will learn which tools and materials to gather, how to prepare the room, and how to sand without leaving marks. We also cover staining, applying a protective finish, and how long to wait before you walk on the wooden flooring or move furniture back.
The process is not difficult, but it does take patience. Most rooms need three to five days from the first sanding pass to the final coat, plus extra time for the finish to cure. If you follow the steps in order and do not rush, you can get results that look professional.
Does Your Floor Need a Full Refinish?
Before you rent any machines, decide how much work the floor really needs. There are two main options, and the right one depends on how deep the damage goes.
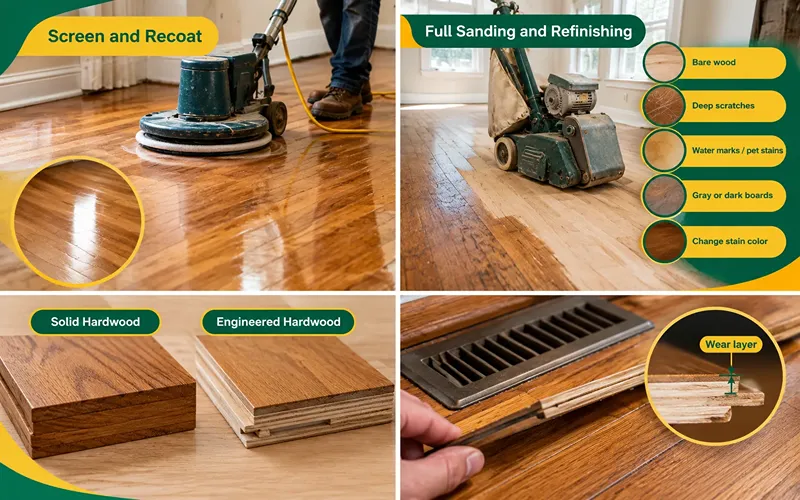
Screen and Recoat (Light Refresh)
If the finish looks dull or has fine surface scratches, but the wood itself is not damaged, you may only need a screen and recoat. This means lightly buffing the old finish so a new coat can stick, then applying one or two fresh coats of polyurethane. It takes about a day and costs far less than full sanding.
Full Sanding and Refinishing
Choose a full refinish if you see any of these signs:
- Bare wood showing in high-traffic areas
- Deep scratches, gouges or dents
- Dark water marks or pet stains
- Boards that look gray or turn dark when water soaks in
- You want to change the stain color
Check Your Floor Type First
Not every wood flooring in Dubai can be sanded the same way. Solid hardwood is usually 3/4 inch thick and can be sanded many times. Engineered hardwood has a thin real-wood top layer over plywood, so it may survive only one or two light sandings. Some very thin engineered floors cannot be sanded at all.
To check, remove a floor vent and look at the edge of a board. The wood above the tongue (the ridge on the side of the board) is the wear layer. If it is very thin, choose a screen and recoat or call a professional.
Tools and Materials You Will Need
You can rent the large sanding machines from most hardware or tool rental stores, often by the day. Gather everything before you start so you do not stop halfway through a coat.
Tools
| Tool | What it is for |
| Drum sander or large orbital floor sander | Removing the old finish across the main floor |
| Edger | Sanding along walls where the big sander cannot reach |
| Floor buffer with screens or pads | Smoothing the floor and scuffing between coats |
| Hand scraper and sanding block | Corners, stair edges and tight spots |
| Shop vacuum with a clean filter | Removing dust between every step |
| Pry bar and hammer | Removing and reinstalling shoe molding |
| Nail set | Sinking nail heads below the surface |
| Lambswool or microfiber applicator, or T-bar | Applying the finish evenly |
| Natural-bristle or foam brush | Cutting in finish along walls |
Materials
- Sandpaper or sanding belts in several grits (36, 60, 80 and 100 or 120)
- Wood filler that matches your floor
- Wood stain (optional) and clean, lint-free rags
- Polyurethane or another floor finish
- Painter’s tape and plastic sheeting
- Microfiber tack cloth or dry mop
Safety Gear
- Dust mask or respirator rated for fine dust and fumes
- Safety glasses and ear protection
- Knee pads and shoe covers
How to Refinish Hardwood Floors: Step by Step
Follow these steps in order. Each one builds on the last, and skipping ahead is the most common reason DIY hardwood laminate floors turn out blotchy or rough.
Step 1: Empty and Prepare the Room
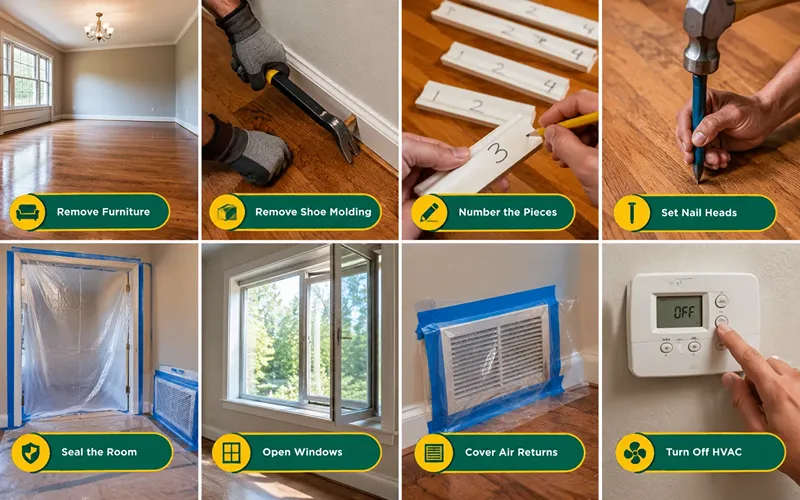
Good preparation makes every later step easier. Start by removing all furniture, rugs, curtains that touch the floor, and floor vent covers.
Next, gently pry off the shoe molding (the thin strip where the baseboard meets the floor). Number each piece on the back with a pencil so it goes back in the right place. Then walk the whole floor and use a nail set to push any raised nail heads about 1/8 inch below the surface. A single exposed nail can tear a sanding belt and gouge the wood.
Seal the room from the rest of the house. Tape plastic sheeting over doorways and cover air returns, because sanding dust travels far. Open windows for airflow, and turn off the HVAC system while you sand.
Step 2: Repair and Clean the Floor
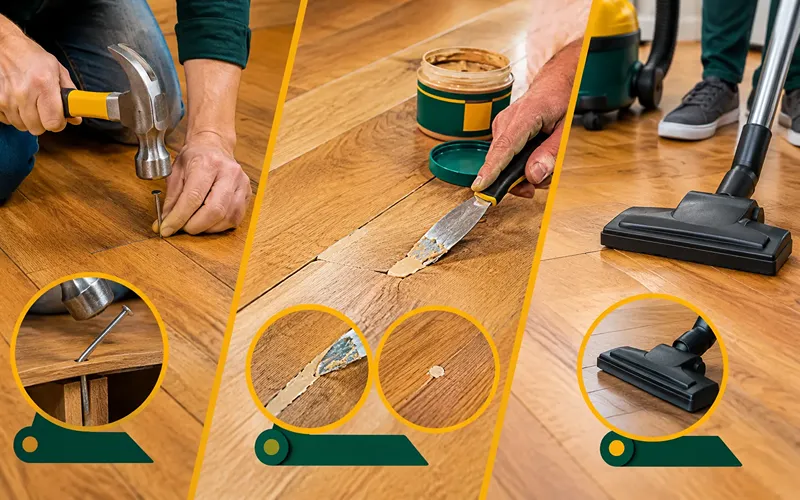
Fix squeaky boards by driving finishing nails at an angle into a floor joist. Fill small cracks and nail holes with wood filler, and let it dry fully. Then vacuum the floor so grit does not get trapped under the sander.
Step 3: Sand the Main Floor
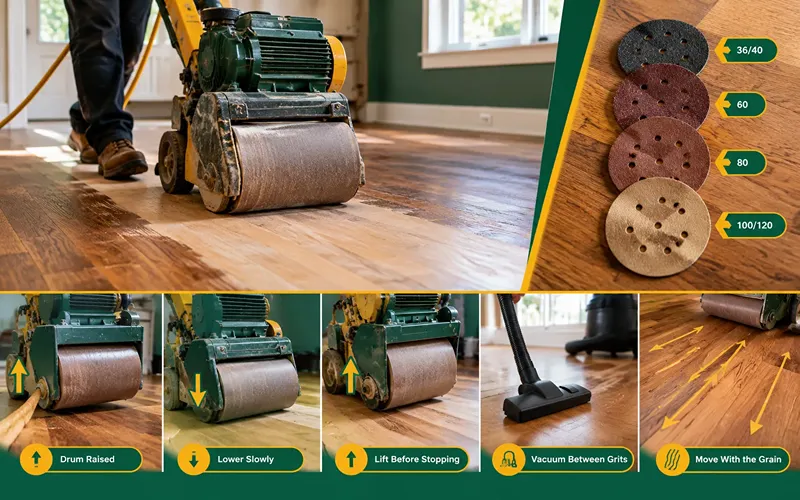
Sanding is the heart of refinishing hardwood floors. The goal is to remove the old finish and surface damage, then smooth the wood in stages.
Work through the grits from coarse to fine. A common sequence for most floors is:
- 36 or 40 grit to remove the old finish and level the wood
- 60 grit to remove the scratches from the first pass
- 80 grit to smooth the surface further
- 100 or 120 grit for a final smooth pass before stain
If the floor is in fairly good shape, you may start at 60 grit. Test a small area first. Try not to skip more than one grit, or the deeper scratches will show through the stain.
When using a drum sander, always move with the grain of the wood. Start with the drum raised, lower it slowly as you walk forward, and lift it before you stop. Never let the drum spin in one place, because it will dig a dip in seconds. Overlap each pass by a few inches and keep a steady walking pace. If you have never used one, practice on a sheet of plywood first.
Vacuum between every grit change. Leftover grit from a coarse paper can scratch the floor during the finer pass.
Step 4: Sand the Edges and Corners
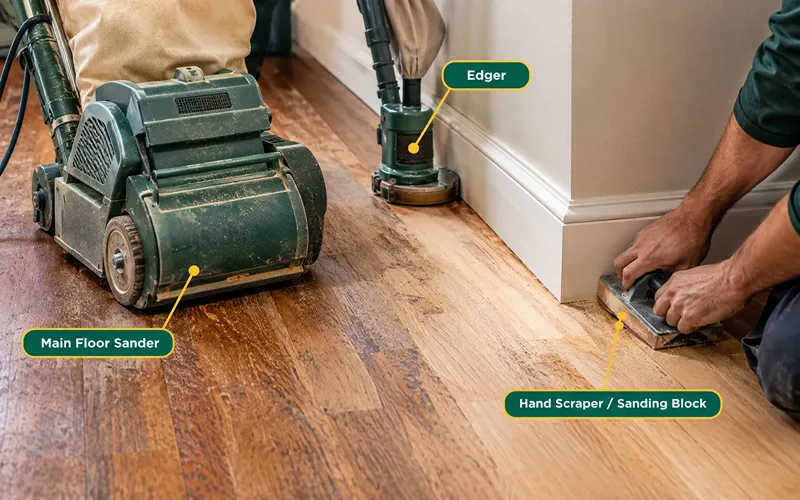
The big sander cannot reach within a few inches of the wall. Use an edger for the perimeter, matching the same grit you just used on the main floor. Keep it moving and let its weight do the work. Finish corners and tight spots with a hand scraper or sanding block, always working with the grain.
Step 5: Buff the Whole Floor
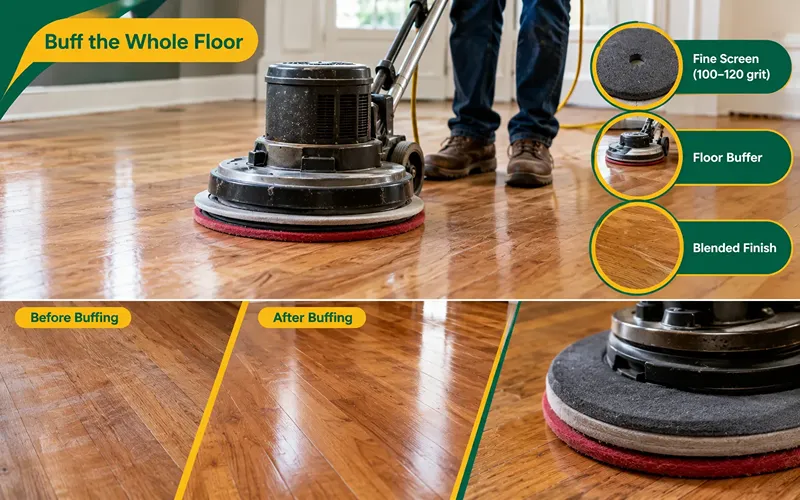
The drum sander and edger leave slightly different scratch patterns. Run a floor buffer fitted with a fine screen (about 100 to 120 grit) over the whole floor to blend them. This step is what turns a good floor into a great one, especially if you plan to stain.
Step 6: Remove Every Bit of Dust
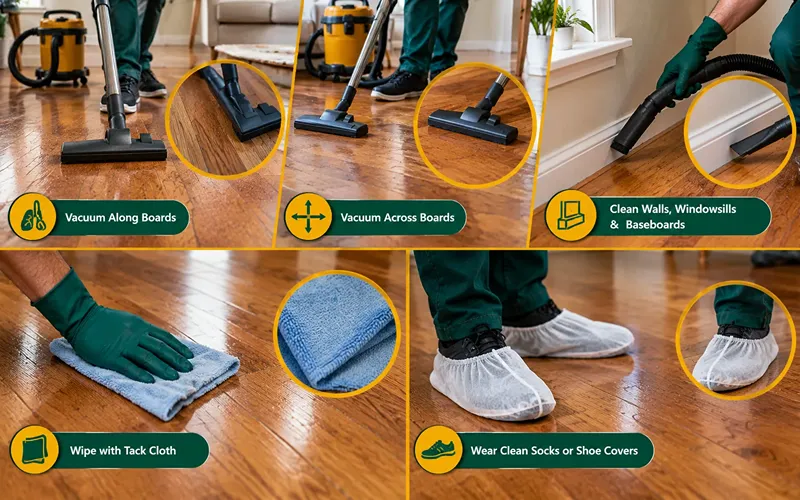
Dust is the enemy of a smooth finish. Vacuum the whole floor along the boards, then across them to pull dust from the gaps. Vacuum walls, windowsills and baseboards too. Finally, wipe the floor with a microfiber tack cloth or a dry microfiber mop. Wear clean socks or shoe covers from this point on.
Step 7: Apply Stain (Optional)
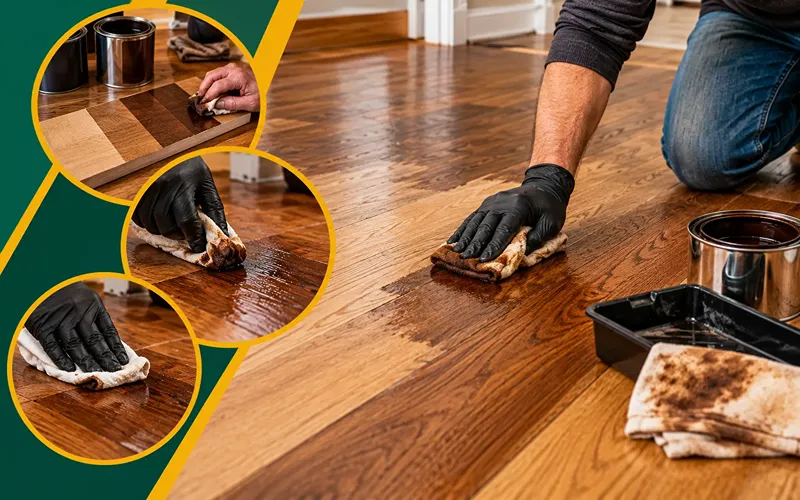
If you like the natural color of the wood, skip to Step 8. If you want a different shade, now is the time to stain.
Always test the stain on a sanded leftover board or a hidden spot first. Color looks different on every wood species. Some woods, like maple and birch, can look blotchy, so a water popping step or a wood conditioner may help.
Apply stain with a rag or foam pad, working with the grain in small sections of a few boards at a time. Let it sit for the time on the label, usually 5 to 15 minutes, then wipe off all the extra with a clean rag. Stain that is left on the surface will not dry properly and will ruin the finish. Plan your route so you finish at a door and do not trap yourself in a corner.
Step 8: Apply the Protective Finish
The finish is what protects the wood from wear, water and stains. Polyurethane is the most popular choice for DIY floors, and it comes in two main types.
| Finish type | Look | Drying between coats | Odor | Best for |
| Water-based polyurethane | Clear, keeps wood light | About 2 to 4 hours | Low | Fast projects, light woods, homes with people living in |
| Oil-based polyurethane | Warm amber tone that deepens over time | About 8 to 24 hours | Strong | Warm look, more working time |
To apply, cut in along the walls with a brush first. Then pour a thin line of finish and spread it with a lambswool applicator or T-bar, moving with the grain. Keep a wet edge so each pass blends into the last, which prevents lap marks. Apply thin coats rather than thick ones, since thick coats dry slowly and can bubble.
After the first coat dries, lightly buff the surface with a fine screen or 220-grit paper. This helps the next coat stick. Vacuum and tack the floor again, then apply the next coat. Most floors need three coats of water-based or two to three coats of oil-based polyurethane. Always follow the instructions on your product label.
Step 9: Reinstall Trim and Let It Cure
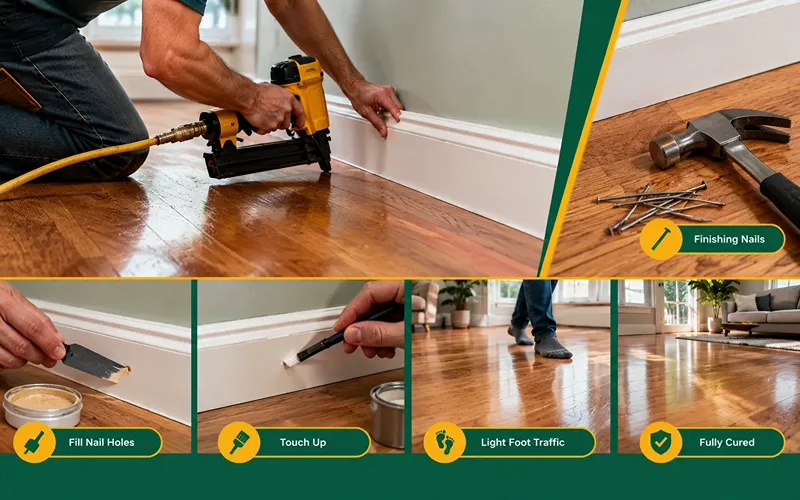
Wait until the floor can handle light foot traffic, then put the shoe molding back using finishing nails. Fill the nail holes and touch them up. Now the hardest part: be patient and let the floor cure fully before normal use.
Hardwood Floor Drying Time: What to Expect
Drying and curing are not the same thing. A finish is dry when it is no longer sticky. It is cured when it has fully hardened, which takes much longer. Use these general times as a guide, and always check your product label.
| Stage | Water-based polyurethane | Oil-based polyurethane |
| Stain dry before finish | 4 to 24 hours (check label) | 4 to 24 hours (check label) |
| Between coats | 2 to 4 hours | 8 to 24 hours |
| Light foot traffic (socks only) | About 24 hours | About 48 hours |
| Furniture back in place | 3 to 4 days | About 4 to 7 days |
| Rugs back down | About 2 weeks | 2 to 4 weeks |
| Full cure | 2 to 3 weeks | About 30 days |
Humidity and temperature change these times a lot. Cool, damp weather slows drying, while warm, dry air speeds it up. Aim for a room temperature of around 65 to 75°F (18 to 24°C) and keep the air moving with fans that do not blow directly onto the wet floor.
Common Mistakes to Avoid
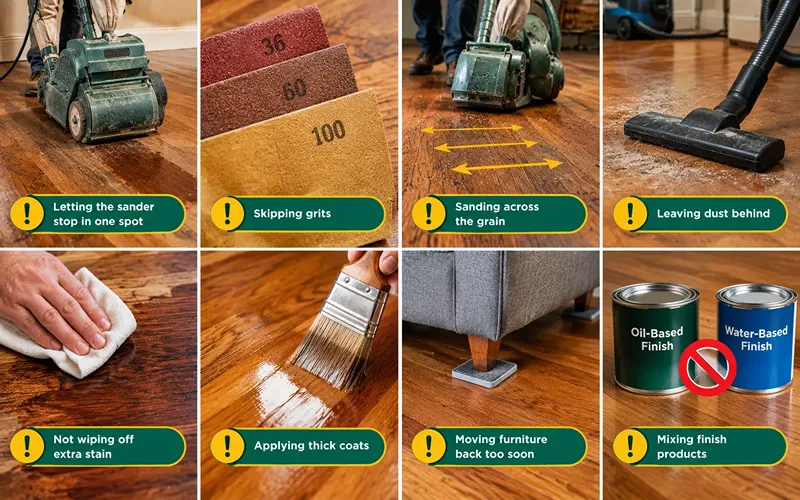
- Letting the sander stop in one spot. A running drum sander digs a dip almost instantly. Keep it moving at all times.
- Skipping grits. Jumping from 36 to 100 grit leaves deep scratches that stain makes even more visible.
- Sanding across the grain. Cross-grain scratches are hard to remove. Always finish with the grain.
- Leaving dust behind. Dust trapped in the finish feels rough and looks cloudy. Vacuum and tack before every coat.
- Not wiping off extra stain. Stain left on the surface stays tacky and stops the finish from bonding.
- Applying thick coats. Thick finish dries slowly, bubbles and can wrinkle. Thin, even coats work better.
- Moving furniture back too soon. The finish may feel dry but still be soft underneath. Wait for the cure times above.
- Mixing finish products. Do not put a water-based finish over an oil-based stain unless the label says they are compatible.
Safety Precautions
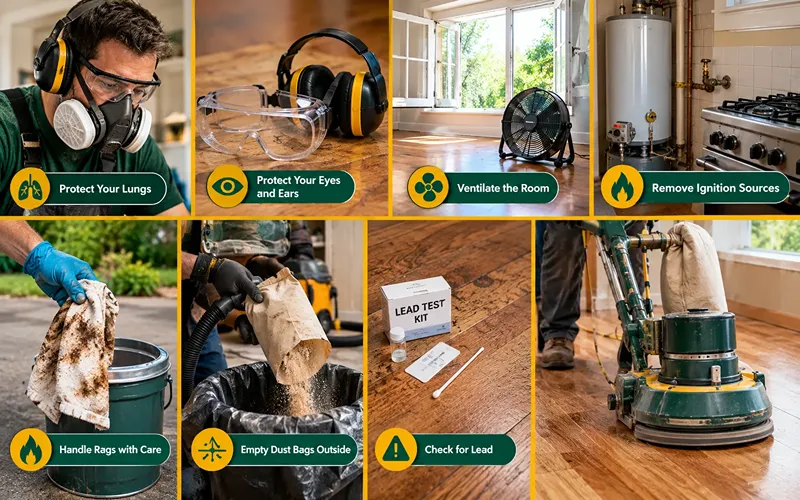
Refinishing involves heavy machines, fine dust and strong chemicals. Take these precautions seriously:
- Protect your lungs. Wear a well-fitted respirator during sanding and when applying oil-based products.
- Protect your eyes and ears. Floor sanders are loud and throw debris.
- Ventilate the room. Open windows and use fans, but keep pets and children away until the fumes clear.
- Remove ignition sources. Turn off pilot lights on gas stoves, water heaters and furnaces when using oil-based products, because the fumes can catch fire.
- Handle rags with care. Rags soaked in oil-based stain or finish can heat up and catch fire on their own. Lay them flat outside to dry, or store them in a sealed metal can filled with water.
- Empty dust bags outside. Fine wood dust is flammable. Empty the sander bag and vacuum often, and never leave dust piled indoors.
- Check for lead. If your home was built before 1978, the old finish could contain lead. Test it before you sand, and hire a certified pro if it is positive.
Practical Tips for Better Results
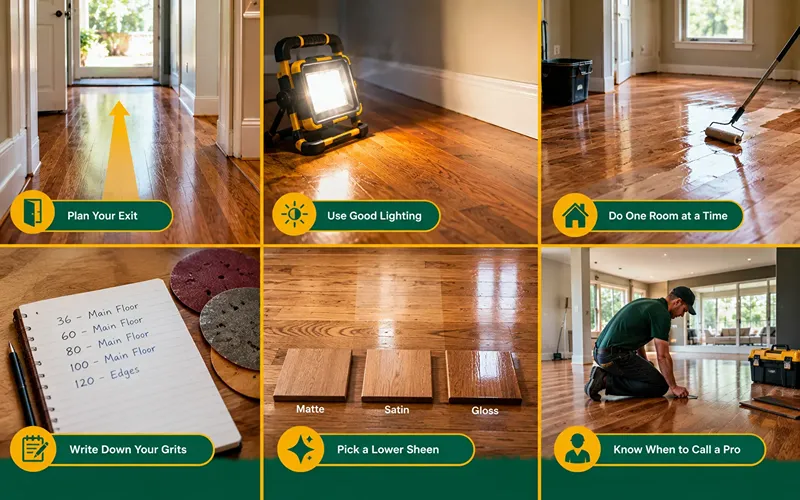
- Plan your exit. Always work toward a doorway when staining or finishing so you never get stuck.
- Use good lighting. Hold a bright work light low to the floor at an angle. It reveals scratches, missed spots and dust.
- Do one room at a time. Smaller areas are easier to manage and keep wet edges.
- Write down your grits. Track which grit you used where, so the edges always match the main floor.
- Pick a lower sheen. Satin and matte finishes hide small scratches and dust better than high gloss.
- Know when to call a pro. Engineered floors with thin wear layers, badly cupped boards, or large open-plan spaces are often worth hiring out.
Conclusion
Now you know how to refinish hardwood floors the right way. Start by checking the floor type and the depth of the damage. Then prepare the room, sand in stages, remove every bit of dust, stain if you wish, and build up thin coats of finish.
The secret to great results is patience. Take your time with sanding, respect the drying times, and protect yourself with the right safety gear. Do that, and your floors will look beautiful and stay protected for many years to come.
Frequently Asked Questions
How long does it take to refinish hardwood floors?
For an average room, plan on three to five days of work. Sanding usually takes one day, staining another, and finish coats one to three days depending on the product. Add two to four weeks for a full cure.
Can I refinish hardwood floors without sanding?
Yes, if the damage is only on the surface. A screen and recoat lightly scuffs the existing finish and adds a fresh topcoat. It will not fix deep scratches, stains or bare wood, though.
How often should hardwood floors be refinished?
Most floors need a full refinish every 7 to 10 years. A screen and recoat every 3 to 5 years can stretch that time and protect the wood.
Is DIY hardwood floor refinishing worth it?
For a confident beginner with a simple solid-wood floor, DIY can save a lot of money. If you are unsure about using a drum sander, start with a small room or a screen and recoat project.