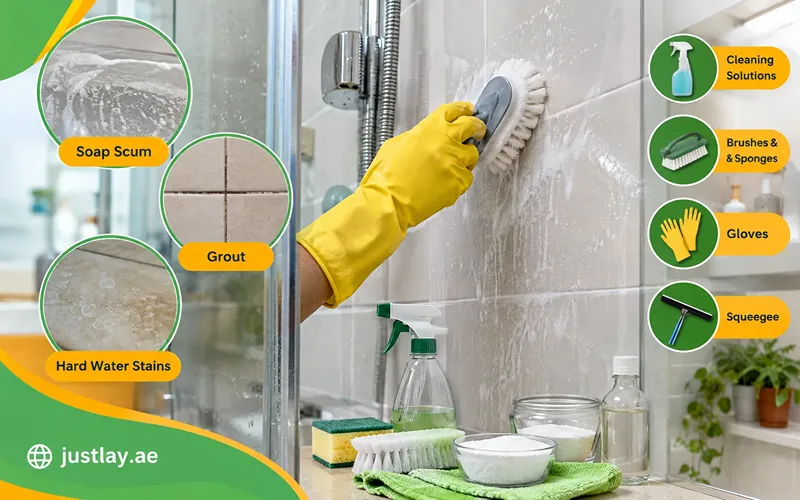
Your shower gets more water, soap, and steam than any other surface in the house. So it makes sense that the tiles turn cloudy, the grout goes grey, and a film builds up that plain water won’t touch.
The good news: you don’t need harsh chemicals or a full weekend. Once you know how to clean shower tiles the right way, most bathrooms come back to life in under an hour, and staying on top of them takes a few minutes a week.
This guide walks through what causes the buildup, what supplies actually work, and step-by-step methods for soap scum, grout, and hard water stains, plus the mistakes that quietly damage tile over time.
Why Do Shower Tiles Get Dirty?
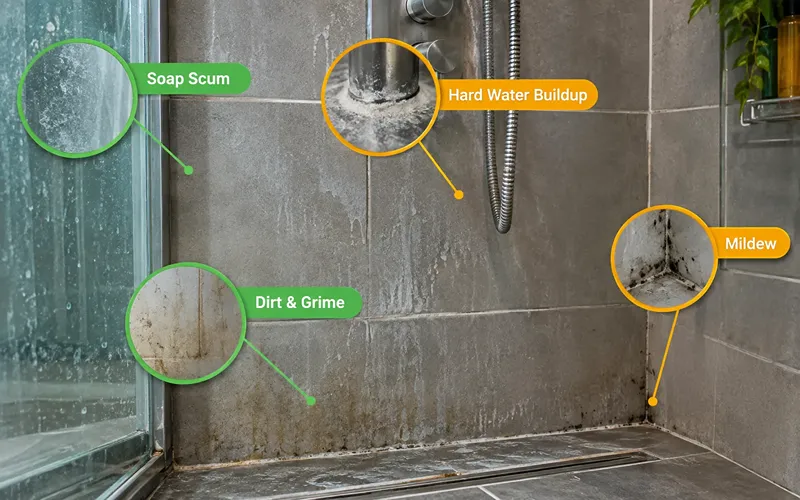
Shower tile cleaning is easier when you know what you’re removing. Three different types of buildup collect on the same wall, and each one responds to a different treatment.
Soap Scum and Hard Water Buildup
Soap scum is the chalky white or grey film that clings to bathroom flooring in Dubai. It forms when the fatty acids in bar soap and body wash react with minerals in your water, leaving behind a waxy residue that bonds to the surface. Rinsing alone won’t shift it because it isn’t water-soluble.
Hard water stains are a separate problem. When water evaporates, dissolved calcium and magnesium stay behind as mineral deposits. These show up as cloudy patches, white streaks, or a crusty ring near the shower floor and fixtures. The harder your water, the faster it happens. The two often layer on top of each other, which is why a single wipe-down rarely restores the original finish.
Dirt, Grime, and Mildew
Dirt and body oils wash off your skin and settle on the lower half of the walls and along the shower floor. On their own they’re easy to remove, but they feed the next problem.
Mildew is a surface mould that thrives in warm, damp, poorly ventilated spaces. It appears as black, grey, or pink speckles, usually in corners, along the silicone seal, and in the grout lines. Grout is porous, so it absorbs moisture and holds organic residue, giving mildew everything it needs to spread.
Left alone, all three problems compound. A month of neglect turns a five-minute wipe into a scrubbing job.
What You Need to Clean Shower Tiles
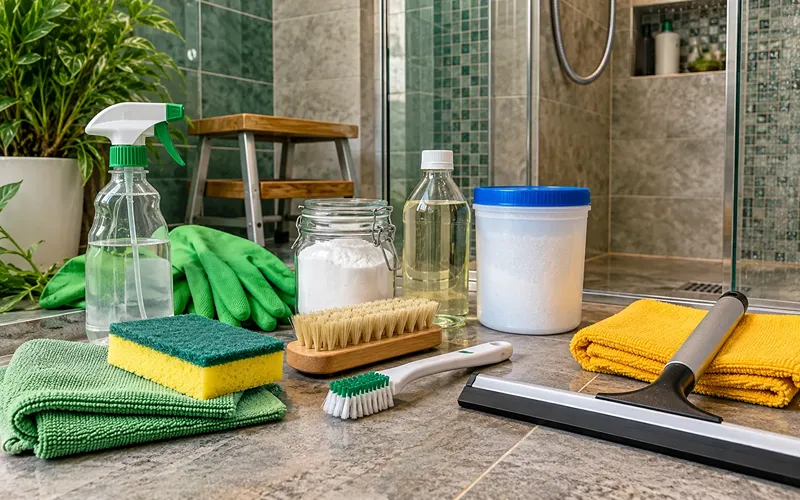
You don’t need a cupboard full of specialist products. A small, well-chosen kit handles almost every situation.
Basic Cleaning Supplies
Gather these before you start:
- Spray bottle: For mixing and applying homemade solutions
- Non-abrasive sponge or microfibre cloth: Safe on glazed tile and glass
- Soft-bristle brush: For general scrubbing across larger tile areas
- Grout brush or a stiff toothbrush: Narrow enough to reach into grout lines
- Rubber gloves: Soap scum removers and bleach-based products irritate skin
- Squeegee: The single most useful tool for prevention
- Dry towel or second microfibre cloth: For drying at the end
- Baking soda: A mild abrasive for paste-based cleaning
- White vinegar: Dissolves mineral deposits on non-stone tile
- Oxygen bleach powder: Brightens discoloured grout without harsh fumes
A step stool helps if your tiles run to the ceiling. Working at full stretch means you’ll skip the top rows.
Choosing the right tile cleaner
The right cleaner depends entirely on what your tiles are made of.
Ceramic and porcelain are glazed and durable. They tolerate diluted vinegar, baking soda paste, and most bathroom sprays. This covers the majority of showers.
Glass tile and glass doors need non-abrasive products only. Vinegar solutions work well; scouring powders will scratch the surface permanently.
Natural stone, marble, travertine, limestone, slate, must never meet vinegar, lemon juice, or any acidic cleaner. Acid etches the surface and leaves dull, permanent marks. Use a pH-neutral stone cleaner instead.
For grout, oxygen bleach is the safest effective option. It lifts staining without the fumes of chlorine bleach and won’t strip colour from tinted grout the way chlorine can.
Not sure what your tile is? Test any new product on a hidden patch first, behind the door, low in a corner, and wait a few minutes before committing to the whole wall.
One rule with no exceptions: never mix cleaning products. Bleach combined with vinegar, ammonia, or another acid releases toxic gas. Rinse thoroughly between different treatments.
How to Clean Shower Tiles Step by Step
This is the core routine. It works for a weekly clean and, with longer dwell times, for a deep clean. Open a window or switch on the extractor fan before you begin.
Remove Loose Dirt and Dust
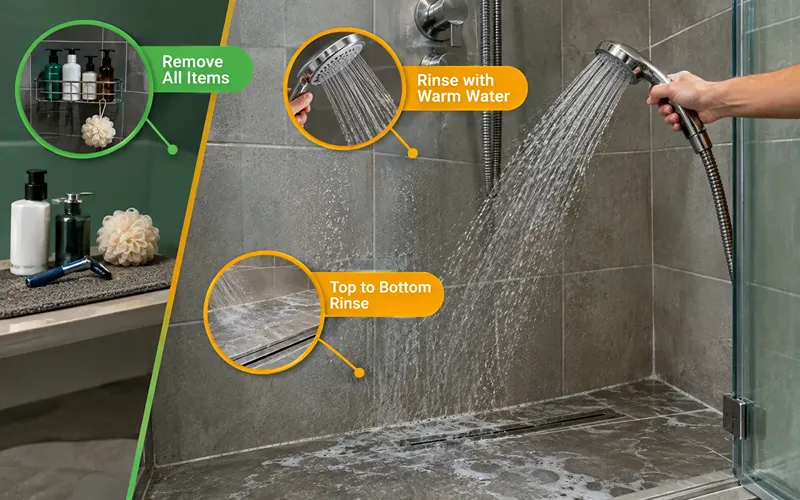
Clear everything out of the shower first, bottles, razors, loofahs, mats, and any removable shelving. Cleaning around them means missing the patches underneath, which is exactly where residue collects.
Then rinse the walls and floor with warm water. This lifts loose dirt and hair, and more importantly it softens the surface layer of soap scum so your cleaner can reach what’s underneath. Warm water also opens the pores in grout slightly, improving absorption.
Give the walls 30 seconds of rinsing from the top down. Don’t scrub yet, dry scrubbing drags grit across the glaze and creates fine scratches.
Apply a Tile Cleaning Solution
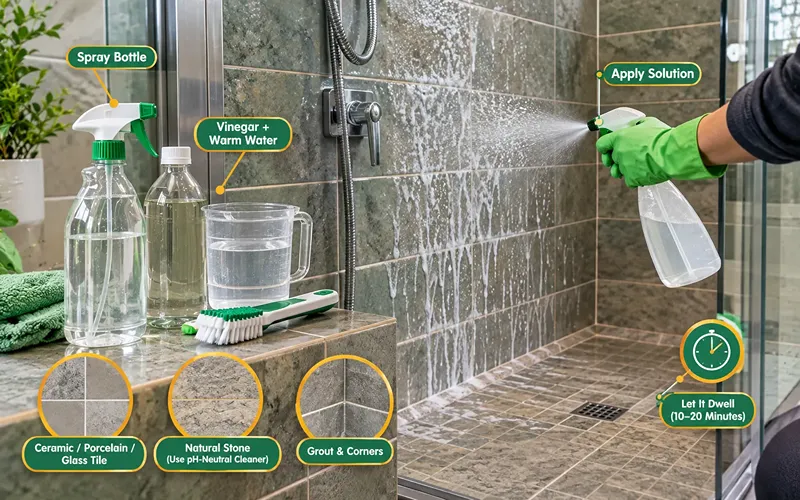
Mix equal parts white vinegar and warm water in your spray bottle for ceramic, porcelain, or glass tile. For natural stone, use a pH-neutral stone cleaner instead. A commercial bathroom spray works fine if you’d rather not mix your own.
Spray generously, working from the top of the wall downward so drips land on tile you haven’t cleaned yet. Cover everything, including grout lines, corners, and the shower floor.
Now leave it. Dwell time does most of the work. Give the solution 10 to 15 minutes to break down soap scum and grime. For heavy buildup, warm the vinegar slightly before mixing and let it sit closer to 20 minutes. If the solution starts running off dry patches, re-spray so the surface stays wet throughout.
Scrub Away Dirt and Soap Scum
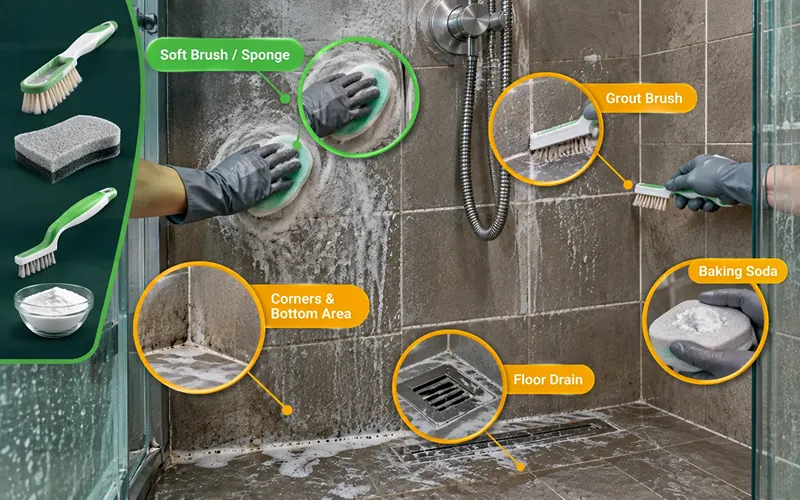
Start with your soft-bristle brush or non-abrasive sponge, using firm circular motions across the tile faces. The residue should feel like it’s releasing rather than needing force. If you’re grinding away, the cleaner hasn’t sat long enough, re-apply and wait instead of scrubbing harder.
Switch to the grout brush for the lines between tiles. Scrub along the grout, not across it, and keep the pressure moderate. Aggressive scrubbing erodes cement grout and creates new gaps for moisture to enter.
Pay extra attention to the bottom third of the walls, the corners, and the area around the shower floor drain. This is where dirt, grime, and mildew concentrate.
For stubborn patches, sprinkle a little baking soda directly onto your damp sponge. It adds gentle abrasion without scratching glazed tile.
Rinse and Dry the Tiles
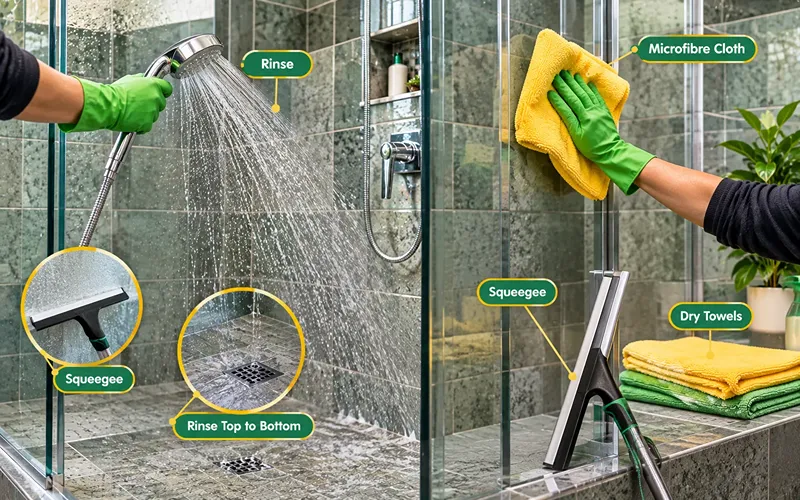
Rinse thoroughly with warm water, working top to bottom again. Leftover cleaner is a real problem, residue attracts dirt and can leave a hazy film once it dries, which makes the tiles look dull even though they’re clean. Rinse for longer than feels necessary.
Then dry everything. Use a squeegee on the walls and glass, then finish with a dry microfibre cloth on the tile, fixtures, and corners.
Drying isn’t an optional final flourish. It’s the step that prevents new hard water stains from forming the moment your fresh clean is finished.
How to Remove Soap Scum from Shower Tiles
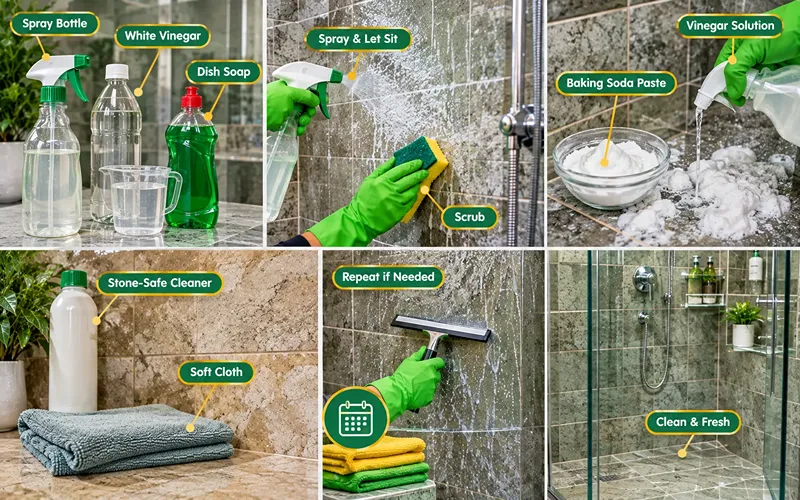
If the general routine left a film behind, soap scum is usually the culprit. It needs a stronger, more targeted approach.
The dish soap and vinegar method works on ceramic, porcelain, and glass. Fill a spray bottle with two parts warm white vinegar to one part liquid dish soap. The vinegar dissolves the mineral portion of the scum while the detergent cuts through the fatty residue.
Spray it on thick, let it sit for 20 to 30 minutes, then scrub with a non-abrasive sponge and rinse well. The solution clings to vertical surfaces better than vinegar alone, which is exactly what you want on a shower wall.
For heavier buildup, make a paste from baking soda and a small amount of water. Spread it over the affected tiles, spray vinegar solution over the top, and let it foam. Once the fizzing stops, scrub and rinse.
On natural stone, skip both methods. Use a pH-neutral stone-safe soap scum remover and a soft cloth.
If scum has been building for months, expect to repeat the treatment. Two moderate applications are safer and more effective than one aggressive scrubbing session.
How to Clean Grout Between Shower Tiles
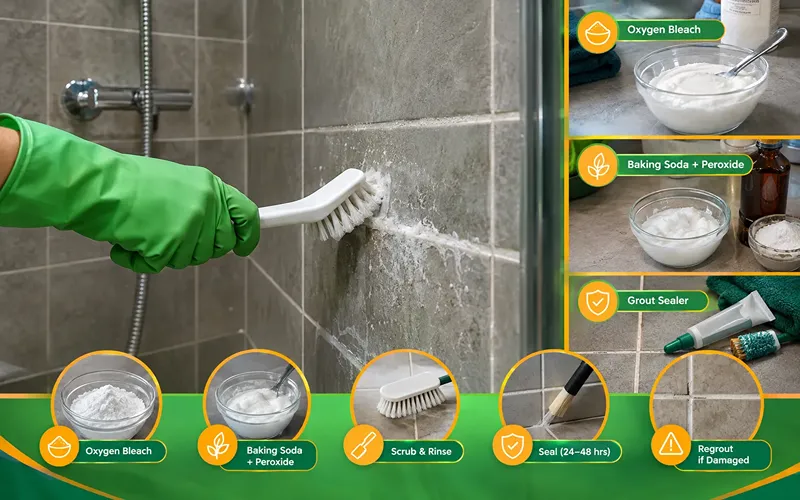
Grout is where most showers lose their clean look. It’s porous, it sits slightly below the tile surface, and it absorbs everything the tiles shed.
For general discolouration, mix oxygen bleach powder with warm water into a thin paste. Apply it along the grout lines and let it sit for 20 to 30 minutes. Oxygen bleach releases oxygen ions that break down staining from the inside out, so the dwell time is genuinely doing the work. Scrub with a grout brush, then rinse thoroughly.
For mildew stains, mix baking soda with hydrogen peroxide into a paste. Apply it to the affected lines, leave it 10 to 15 minutes, scrub, and rinse. Test coloured grout on a small area first, peroxide can lighten pigment.
A few cautions. Avoid vinegar as your regular grout cleaner. It works in the short term, but repeated acid exposure erodes cement-based grout and widens the pores you’re trying to keep sealed. And don’t reach for a wire brush or metal scraper; you’ll remove grout along with the stain.
Seal it afterwards. Once the grout is clean and completely dry, give it 24 to 48 hours, apply a penetrating grout sealer. Sealed grout resists moisture and staining, and it makes every future clean noticeably easier. Cement grout generally needs resealing every one to two years. Epoxy grout doesn’t need sealing at all.
If your grout stays dark after cleaning, or looks crumbly and cracked, the issue may be damage rather than dirt. At that point regrouting is the real fix.
How to Remove Hard Water Stains from Shower Tiles
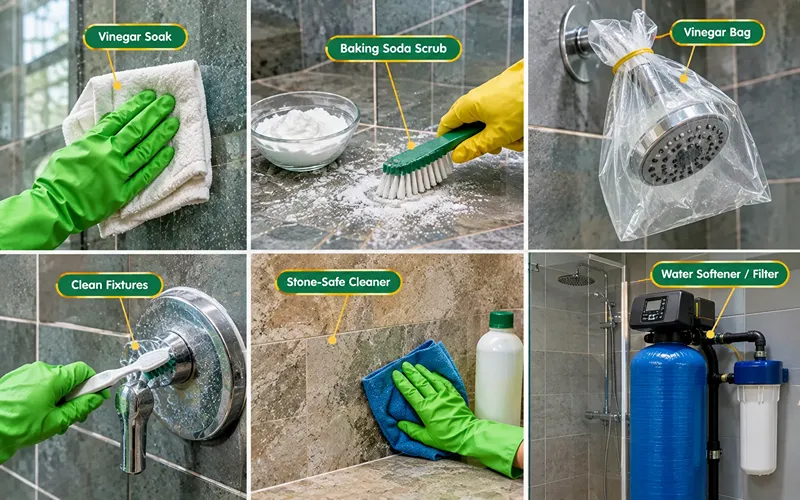
Hard water stains are mineral deposits, and minerals dissolve in acid. That’s the whole principle.
For ceramic, porcelain, and glass, soak a cloth in undiluted white vinegar and press it flat against the stained area. Leave it in place for 15 to 30 minutes so the vinegar stays in contact rather than running off. Then scrub with a soft brush and rinse.
For heavy limescale, sprinkle baking soda over the damp surface after the vinegar soak and scrub gently. The mild abrasion helps lift deposits the acid has already loosened.
Around fixtures and the showerhead, fill a plastic bag with vinegar, secure it over the fitting with a rubber band, and leave it for an hour. Scrub with a toothbrush and run the water to flush the nozzles.
For natural stone, use a stone-safe limescale remover. Acid will etch the surface and cause damage that cleaning can’t reverse.
If stains return within days of cleaning, your water is hard enough that a water softener or an inline shower filter will save you far more effort than repeated scrubbing.
How to Prevent Dirt and Grime on Shower Tiles
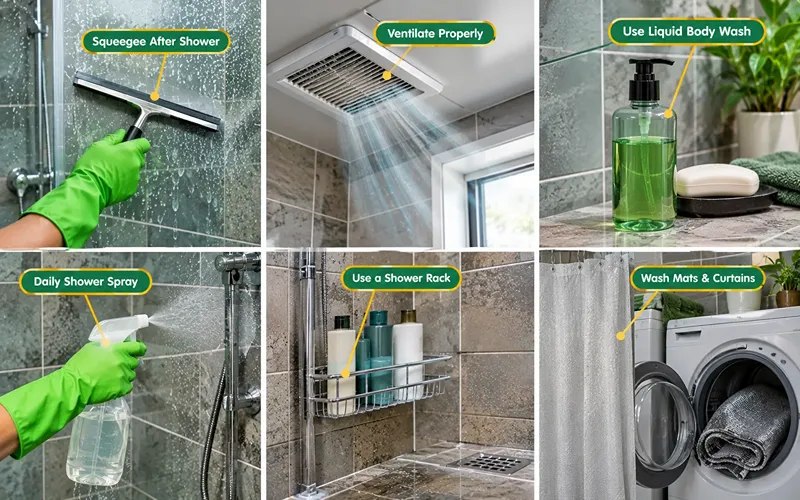
Prevention is where the real time savings are. These habits take under a minute a day.
Squeegee the walls after every shower. Removing standing water stops hard water stains before they form and leaves soap scum nothing to bond to. This is the highest-impact habit on the list.
Ventilate properly. Run the extractor fan or open a window during your shower and for at least 20 to 30 minutes afterwards. Dry air is the simplest defence against mildew.
Switch from bar soap to liquid body wash. Bar soap contains the fats and talc that form most soap scum. Liquid formulas leave far less residue.
Keep a daily shower spray in the cubicle. A quick mist after your last shower of the day breaks down residue before it hardens. A homemade vinegar-and-water spray does the same job on non-stone tile.
Don’t store bottles on the shower floor. Products sitting directly on tile trap moisture underneath and create rings that are hard to remove. Use a rack or caddy that drains.
Wash shower mats and curtains regularly. Both harbour mildew that spreads back onto clean tile.
Common Mistakes to Avoid When Cleaning Shower Tiles
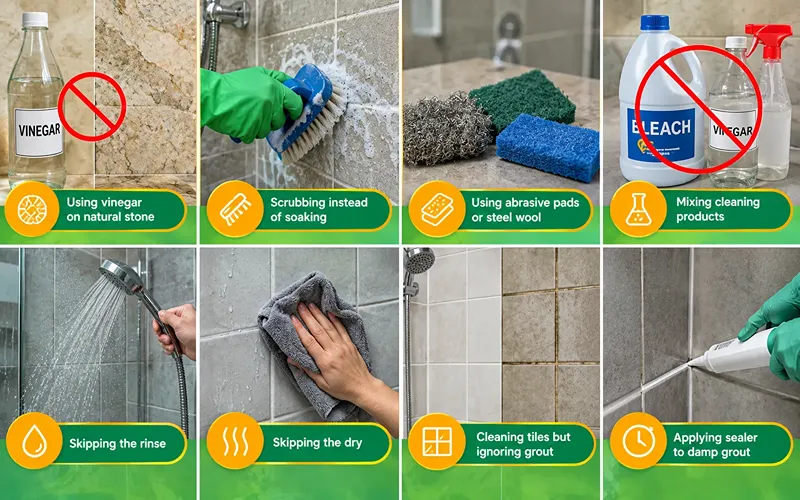
These are the errors that cost people time or cause permanent damage.
Using vinegar on natural stone. The most common and most expensive mistake. Acid permanently etches marble, travertine, and limestone.
Scrubbing instead of soaking. Buildup dissolves with dwell time. Scrubbing harder wears down glaze and grout without removing more residue.
Using abrasive pads or steel wool. These leave micro-scratches that trap dirt, so the tiles get dirty faster after every clean.
Mixing cleaning products. Bleach with vinegar, ammonia, or other acids produces dangerous gas. One product at a time, with a thorough rinse in between.
Skipping the rinse. Cleaner residue attracts dirt and dries to a dull haze.
Skipping the dry. Leaving the walls wet undoes the clean, since fresh mineral deposits start forming as the water evaporates.
Cleaning tiles but ignoring grout. Spotless tile framed by dark grout still reads as a dirty shower.
Applying sealer to damp grout. Trapped moisture leads to a cloudy white haze. Wait until the grout is completely dry.
How Often Should You Clean Shower Tiles?
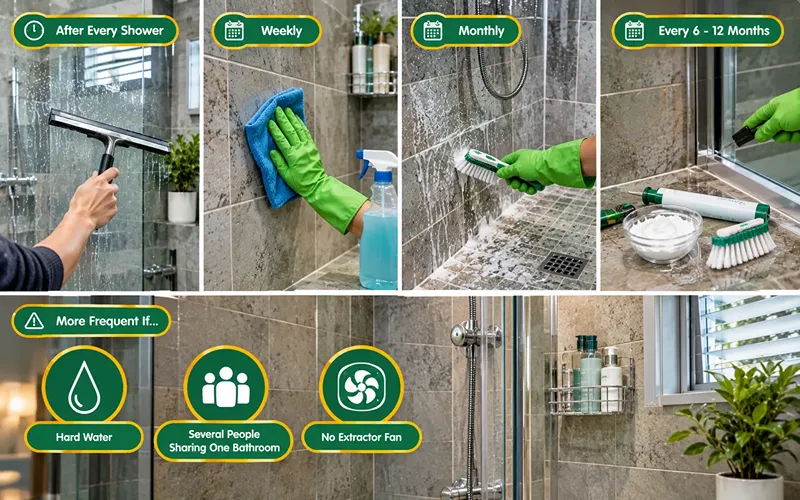
Consistency matters far more than intensity. A realistic schedule:
After every shower (under a minute): Squeegee the walls and glass, and leave the fan running or the window open.
Weekly (10 to 15 minutes): Spray the tiles with a mild cleaner, give it a few minutes, wipe down with a sponge, rinse and dry. This alone prevents most soap scum from ever establishing itself.
Monthly (30 to 45 minutes): Run the full step-by-step routine above, including a proper scrub of the grout lines, corners, and shower floor.
Every 6 to 12 months: Deep clean the grout with oxygen bleach, treat any hard water staining, check the silicone seals for mildew, and reseal grout if it’s due.
Households with hard water, several people sharing one bathroom, or no extractor fan should move each of these up a step in frequency.
Final Thoughts
Knowing how to clean shower tiles comes down to three things: matching the cleaner to your tile type, letting it sit long enough to do its job, and drying the surface when you’re finished.
Soap scum, hard water stains, and mildew each need a slightly different treatment, but none of them requires aggressive scrubbing or harsh chemicals. Give the product time, use soft tools, and protect your grout with a sealer.
Then let the daily habits carry the load. A squeegee and good ventilation will keep your tiles looking clean with a fraction of the effort a monthly deep clean demands, and that’s the difference between dreading the job and barely noticing it.